Buffer a feature
A buffer function can be applied to individual features, and accessed from the following locations in the application:
- Results table
- Results side panel
- Places
Results Table
The results table must first be populated by running a query or identify action. If required, refer to these FAQ’s and Tutorials:
- How to query a layer’s attributes (help item)
- How to query layers intersecting a feature or place (help item)
- Searching and querying (video tutorial)
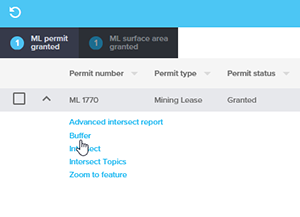
Once the table is populated, click the down arrow next to the feature you are interested in, and click Buffer.
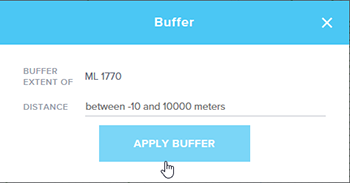
Enter your required buffer value, in metres and then click Apply Buffer. For lines and points only positive values are accepted. For polygons, a positive or negative value can be entered between -10 and 10,000m. A negative value will create a buffer inside the polygon.
View your buffer on the map.
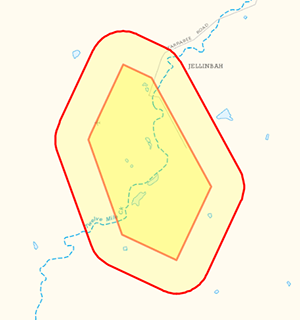
Note it has been added to Places as a Buffer Feature.
Results Side Panel
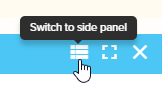
Follow the steps to populate the results table, as shown above. Once the table is populated, click on the Switch to side panel button at the table’s top right.
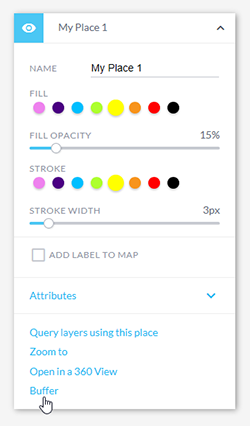
Click on an individual feature in the list, and then click Buffer.

Enter the buffer value as described above, and view the results.
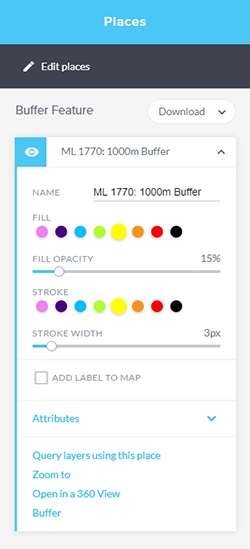
How to buffer Places
A buffer can be applied to any Place you have. For more information on creating a place, refer to the following documentation and video tutorials:
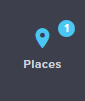
Once you have created a place, view it by clicking the Places button

Click the down arrow next to your selected place, and click Buffer.
Enter a buffer value and review the results as described above.