Past imagery tool
The Queensland Government has a large collection of imagery on offer for use within the GeoResGlobe. The imagery, captured by using satellites, planes and drones, can be sourced using the Past Imagery tool.
Use the Past imagery tool to source recent, historical aerial and satellite imagery, whilst in 2D or 3D view mode.
Finding imagery capture date
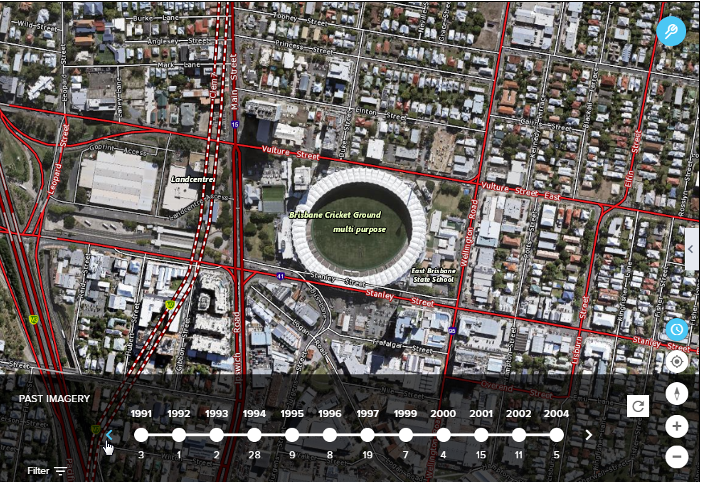
The best way to find out the date of the imagery that you are trying to identify is to use the Past imagery, located down near the lower right corner of the screen. Navigate to your selected area then open the Past Imagery Tool.
Once activated, you can search through all available imagery within the current map extent and discover capture dates for the most recent Imagery available, as well as historical aerial photography.
Adding the imagery project as a layer ensures you are seeing that project’s imagery and you can be sure of the capture date from the associated project attributes.
Using the past imagery tool
The Past imagery tool is located in the lower right corner of the screen, navigate to your selected area then open the past imagery tool.
The Past imagery tool is scale dependant, zoom in to a scale of at least than 1:50,000 to use it, when the button is greyed out it is unavailable.
- Zoom in to the point where the Past Imagery tool icon is highlighted, then click on the icon.
- The timeline displayed along the bottom of the screen shows the year of imagery capture with the number below showing how many images were captured. Click on the arrows pointing left/right to explore earlier/later years.
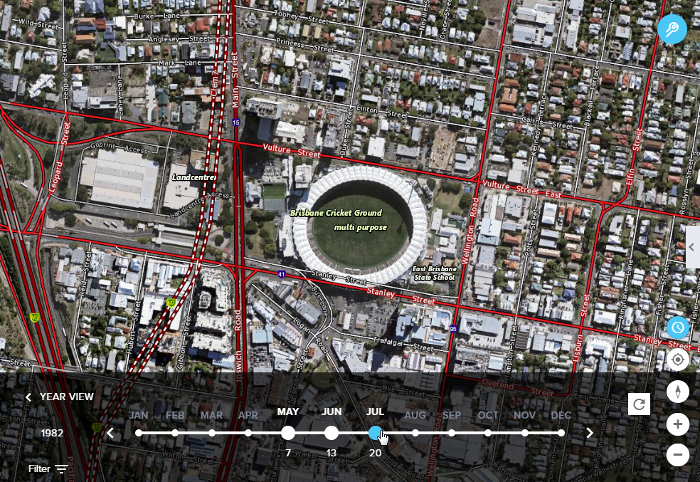
- Click on a year to select it, the timeline will display prominently the months when the imagery was captured. Use the arrows pointing left/right to explore adjacent earlier/later years.
- The count of imagery results will be shown per year and then month. When no imagery projects are listed for that month, the month is greyed out and will not allow for selection.
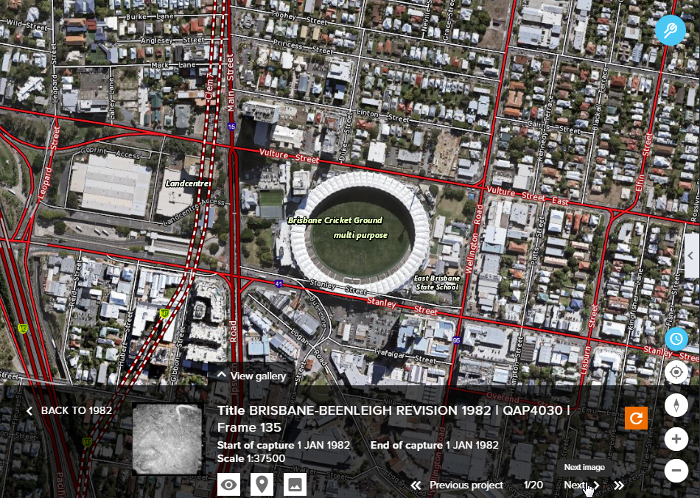
- Select the month to display a thumbnail of the image, listed by project. Further information, such as the title of the project, precise date of capture (start and end) and scale will be displayed.
- You can use the Previous project/Next project options down along the bottom right to toggle through the search results to find the imagery that best suits.
- Selecting the Back To (Year) button at top left will return to the timeline to view other years.
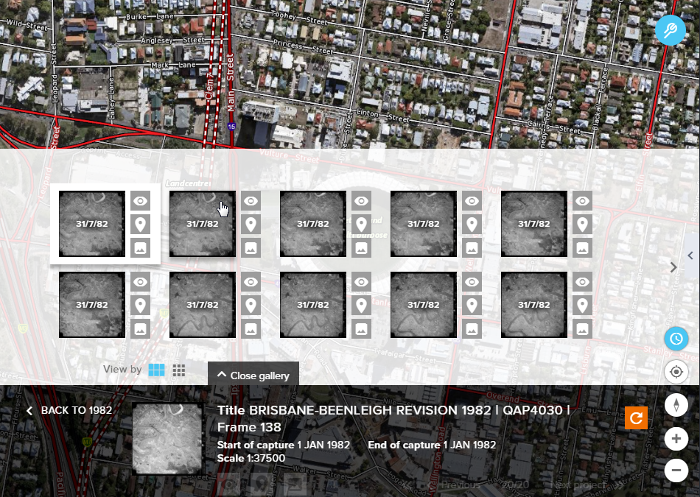
- Click View gallery to display the thumbnails of the available imagery that falls within the current map extent for the date selected.
- With the gallery open, the start of capture date is displayed on the image thumbnails.
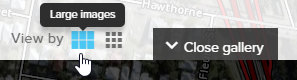
- You can select to view images within the gallery by large images or small images.
- Click Close gallery to close the gallery.
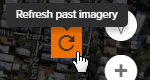
- A warning message is displayed on the screen if the map extent has been adjusted. The message can be manually dismissed or auto dismissed after 15 secs.
- Click the orange Refresh past imagery button if this occurs. The imagery available through the Past imagery tool will correctly reflect the adjusted map extent once this has been selected.

View past imagery
The Past Imagery tool offers access to a large catalogue of aerial imagery projects and historical imagery frames that can be incorporated into your GeoResGlobe map.
Many images align with the map coordinate system used by GeoResGlobe, which means that we can use the imagery as a base map and overlay it with other layers of information.
There are two types of images available.
- Rectified images - Typically more recent imagery that have been stitched together to form a mosaic. These can be added as layers to your map directly from the Past imagery tool. These are not available for download.
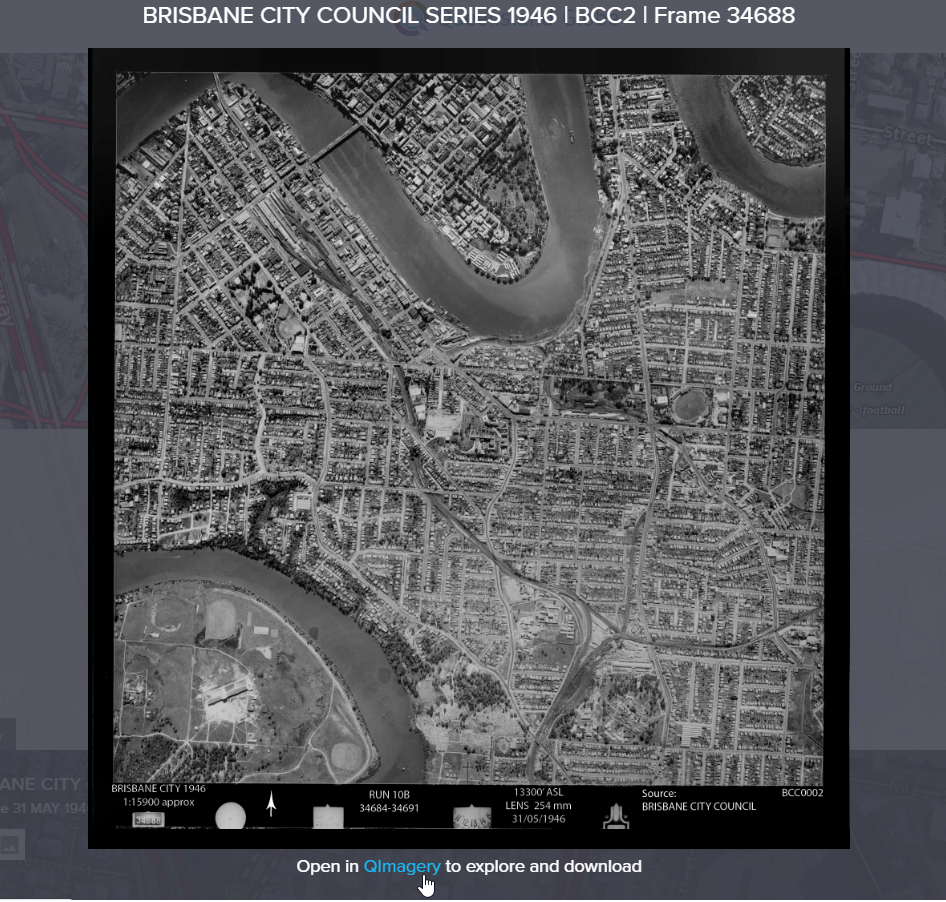
- Unrectified frames - The footprint of each of these historical imagery frames can be added as a place, allowing you to retain the attributes for that image. The image and associated world file can be downloaded from QImagery. The Preview image option displays a larger preview of the image selected, and a link to QImagery is available below this preview. If packaged into a .ZIP these can be re-imported as a layer and the GeoResGlobe will use the world file to place the geolocated historical imagery frame.
Selection of a rectified image(s) and an unrectified image(s) have the following icon options.
| Icon options | Description | Rectified Image(s) | Unrectified Image(s) |
|---|---|---|---|
 |
Preview on map - This allow you to view the rectified imagery or highlight the footprint of an unrectified image on map, without adding it as a layer or place. | ✔ | ✔ |
 |
Add as layer - This adds imagery mosaic as a layer to the layers list. | ✔ | ✘ |
 |
Add as a place - This adds imagery footprint to the places list. | ✘ | ✔ |
 |
Preview image - Displays QImagery preview and includes a link to the QImagery application. | ✘ | ✔ |
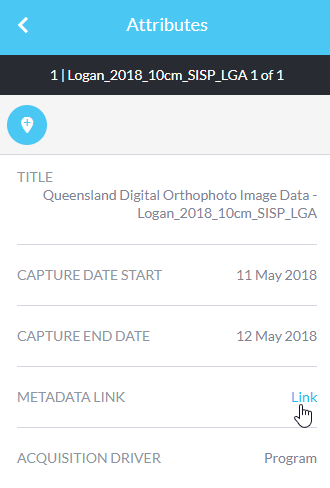
View image attributes
Open the added imagery layer and select View image attributes to display the image attributes such as title, capture date, metadata link, and source etc.
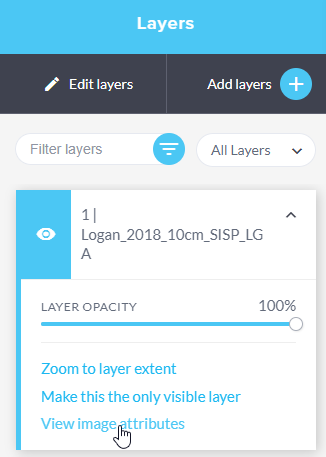
Click the metadata link to open Queensland Spatial Catalogue in a new browser.
Customise search
If you wish to further customise your search results, this can be done using the Filter options.
| Filter options | Description |
|---|---|
 |
Date slider - Drag each slider to customise and narrow your date range. |
 |
Date boxes - Change the date in the boxes to narrow your date range and date slider will update accordingly. |
 |
Include outlines of historical imagery - Uncheck the ‘include outlines of historical imagery’ option if you only want to see the results that can be added as layer to the map. If selected, both rectified and unrectified imagery results are returned for the date range specified. |
 |
Include low resolution imagery - If left unchecked only high resolution imagery results are returned. If selected, both low and high resolution imagery results are returned for the date range specified. |
 |
Filter - Once the filter parameters are set, click the Filter button to activate it. |
Click the Past imagery button again to close this tool.
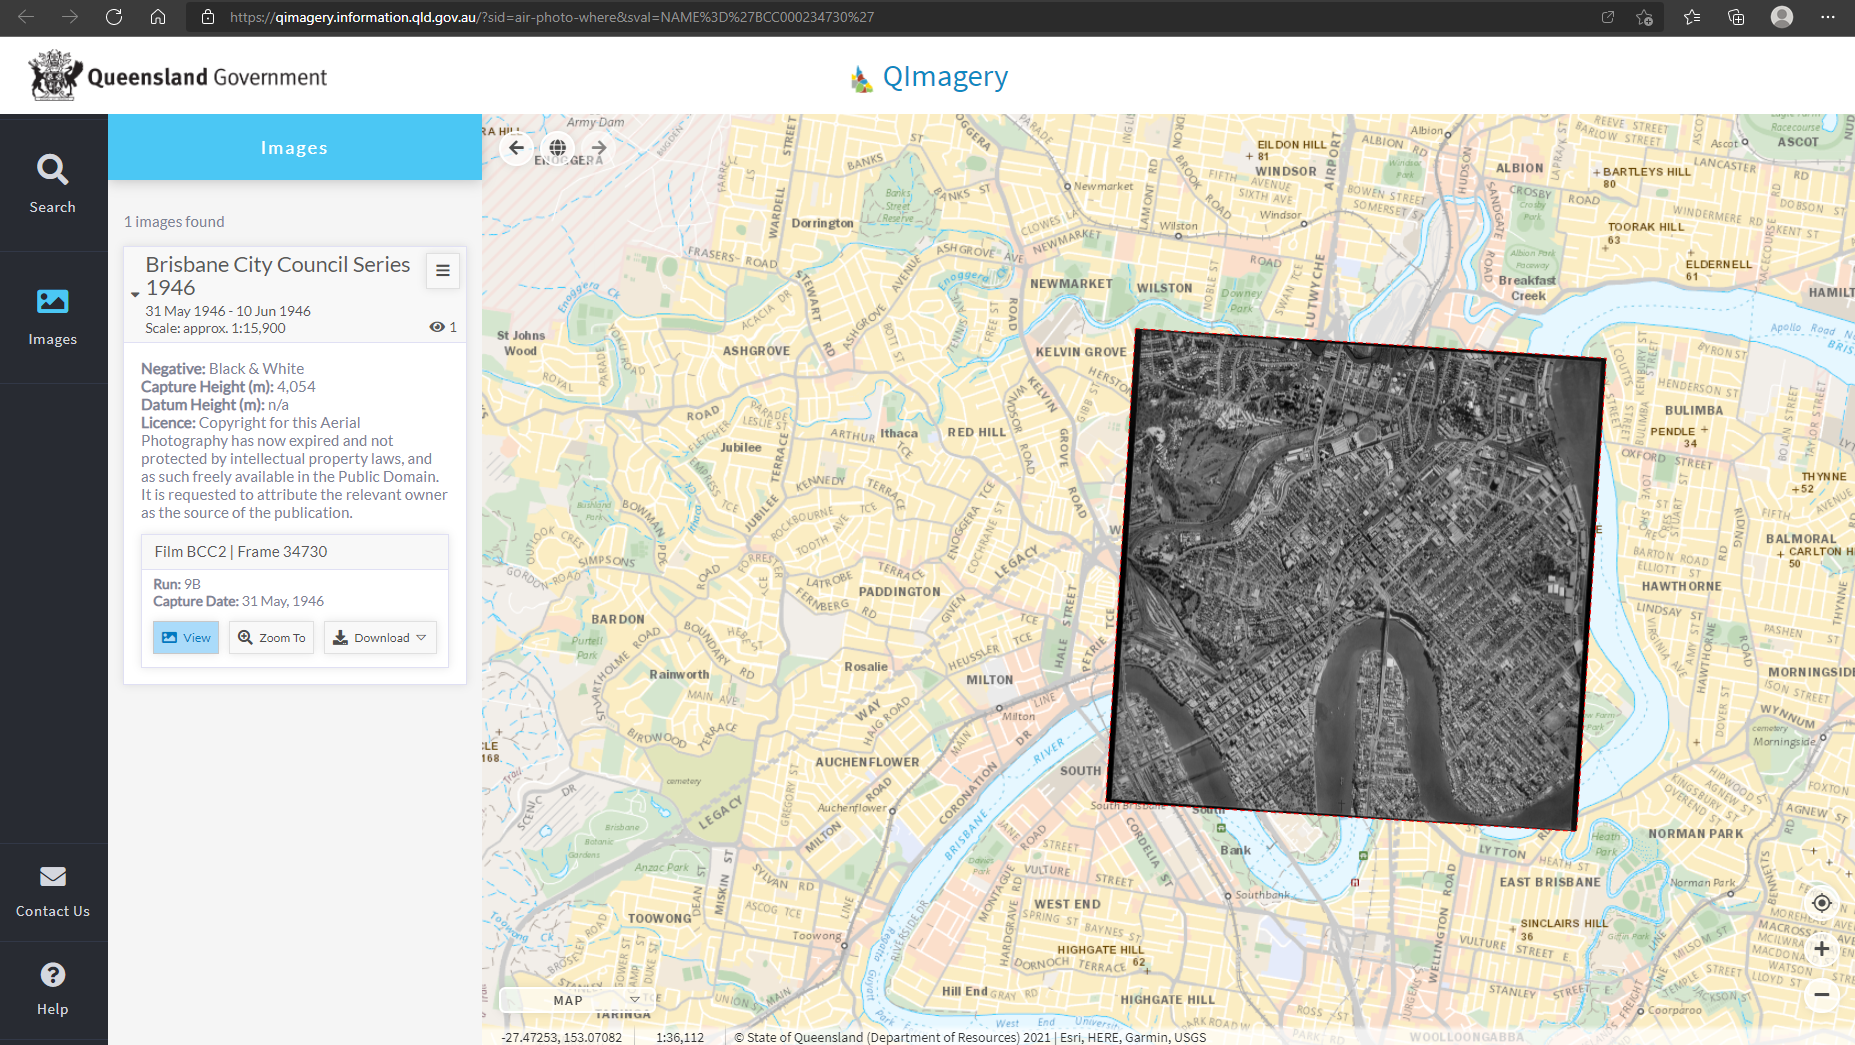
Link to QImagery
When using the past imagery tool, the QImagery preview allow you to link to the QImagery application where the historical aerial photography image and associated world file can be downloaded.
The following process outlines how this imagery can be added into the GeoResGlobe as a layer.
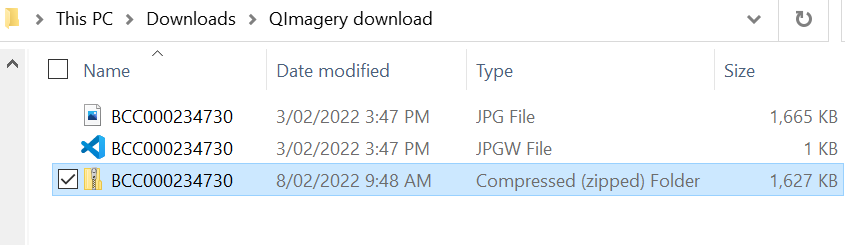
- Once you have identified the image you wish to download, select the link to open in QImagery.
- Accept the terms and conditions of use checkbox to open QImagery.
- The image preview will display in QImagery.
- Download the Raster Image (JPG) and the world file (JPGW).
- To import an image that will recognise the accompanying world file settings, you must package the JPG and JPGW into a compressed zip folder.


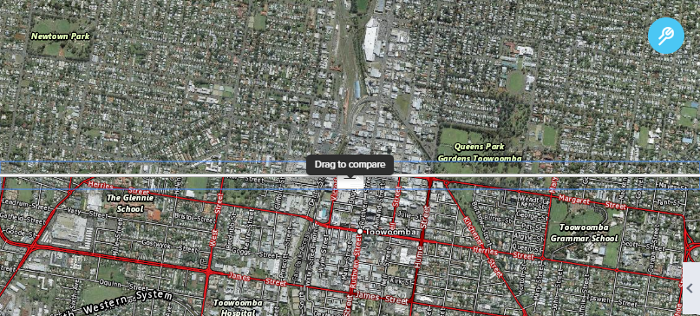
Swipe Tool
As you can see past imagery tool is a powerful way to research historical imagery and view change over time. You can use the Swipe tool for comparison of both imagery and data layers within two view modes (Horizontal and Vertical).
Swipe tool is available in the 2D mode only and can be used at any scale. It is not available on mobile phone and cannot be printed through the Print function.
The Swipe tool is located in the bottom right-hand corner above the Past imagery tool, click the tool icon to activate it.

To compare specific layers or image, use the Layers panel to add or make visible the layers that are going to be used in the swipe tool.
Please note to try to keep the swipe tool efficiently try to limit the number of layers that are active.
Once you open the swipe tool, a menu on the bottom of the screen displays left view and right view.
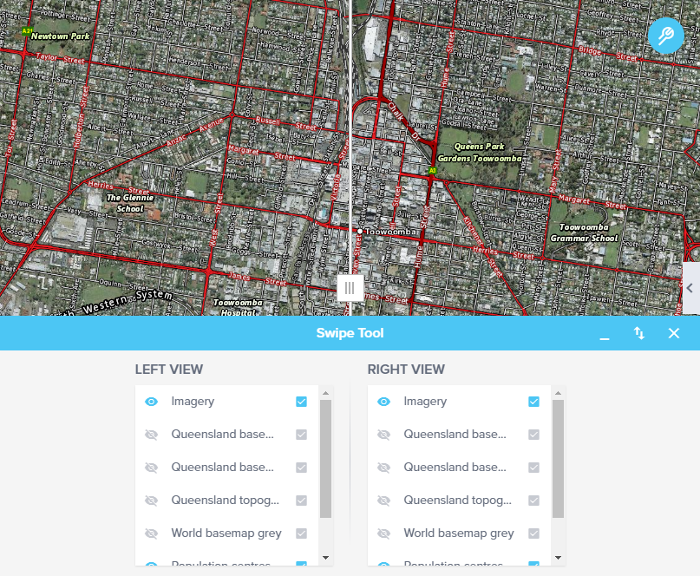
Both views are based on the layers currently active on the map in the layers list. Deselecting layers from one side will hide those layers from that view.
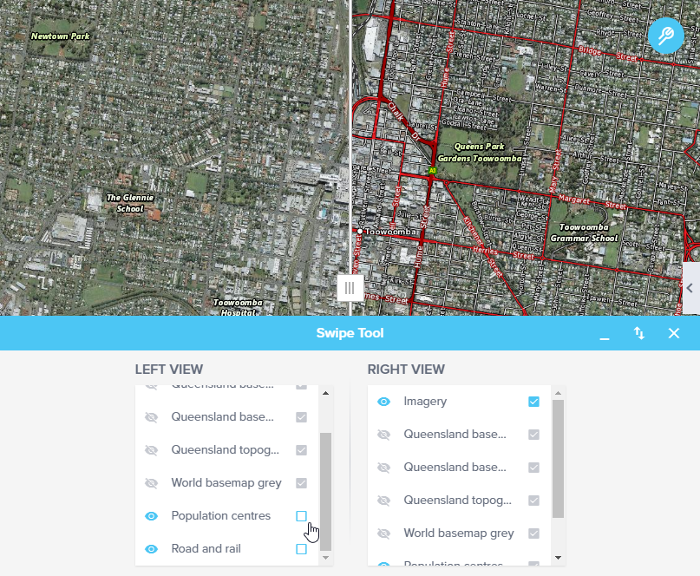
You can drag the slider up and down or left and right to view and compare the selected layers.