Log into an account
Some features within the GeoResGlobe will require users to login to an account to make them available for use. If you have an existing account with an accepted provider, this can be used to login to the application.
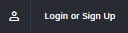
Click on the Login or Sign Up button to reveal a range of accepted account options.
Select a provider option from the icons displayed and enter your credentials to login. Account options include:
- ArcGIS Online
- QGov
- LANDS (a network option available for some Queensland Government employees)
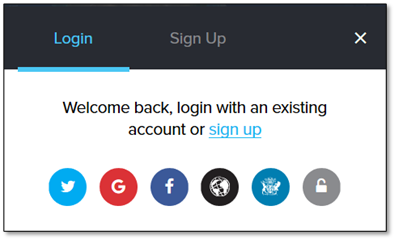
If you don't have an existing account, click Sign Up, and create a new account with one of identity providers.
You can confirm that you are logged in by viewing your username in the top right corner button.
You will need to login with your preferred provider account to utilise the following GeoResGlobe features:
- Save a map
- Share a map
- User-added imagery imported via the ADD MY DATA tool
- Georeferencing tools
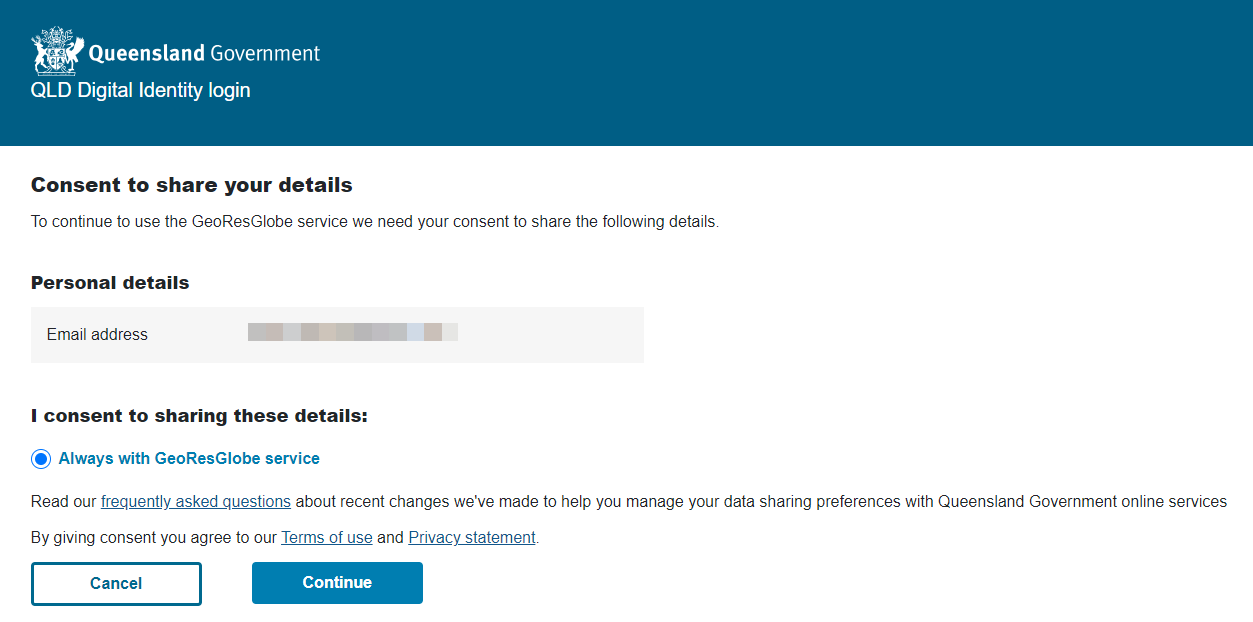
QGov and LANDS upgrade to Tell Us Once (TUO)
As part of a whole of State Government project, QGov and Lands users will be upgraded to the Tell Us Once (TUO) platform.
When new or existing users log in for the first time after the release on the 22nd January 2024, you’ll be asked for your consent to share your details via the Qld Digital Identify broker.
Simply select the tick box to Consent and scroll down to the bottom of the page to click Continue. For more information about Logging into an account scroll up.
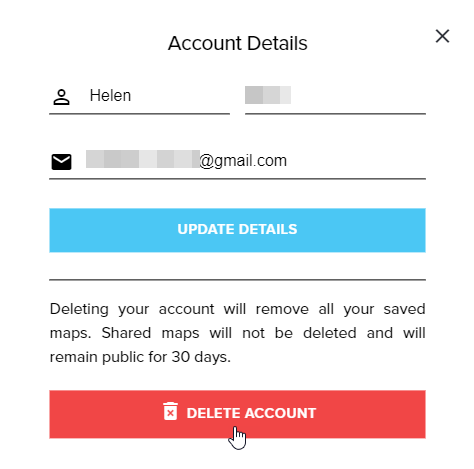
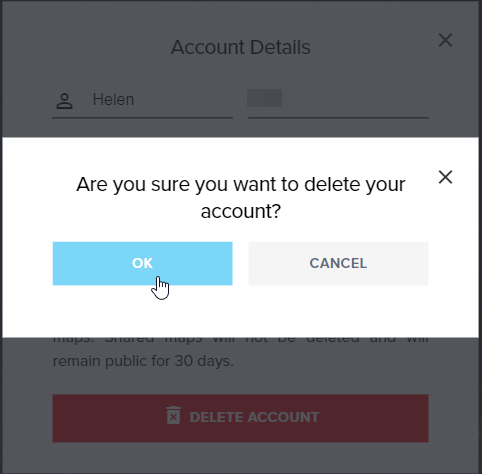
Delete your account
When you delete an account, please note that you delete both the account and any maps you have created.
To delete an account
- Firstly, sign into the account.
- Rest you mouse on top of your account.
- Select Delete account.
- A confirmation message pops up. You have the option to Cancel and go back to the original screen or select OK to delete the account and all saved maps will be removed.

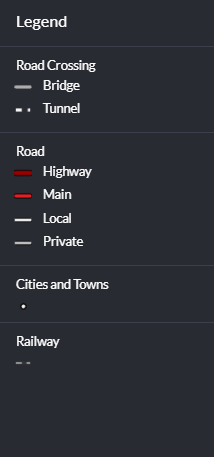
Map legend
On the right side of the interface, we find an arrow that will reveal, or hide the map legend.
The map legend is dynamic and will display the data layers that are currently visible in your map window.
Show legend in extent only
This option populates the legend based on the features contained within the current extent. This is enabled by selecting the checkbox at the top of the expanded legend panel.

Hide places in legend
If places have been added to the map, the symbology associated with each place is displayed automatically in the legend. This can be hidden by selecting the Hide places in legend checkbox at the top of the expanded legend panel. Deselect the checkbox to view the places in the legend.

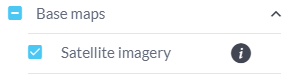
How to find the satellite imagery capture date
The Past Imagery tool can be used to find the capture date of the imagery displayed within the Satellite imagery basemap. Instructions for how to do this are provided below:
Turn on the Satellite imagery layer within in the Basemaps group.
Zoom into your area of interest and click on the Past Imagery button (just above the navigation tools at the bottom right of the screen). The tool is scale dependent, so if it appears greyed out, keep zooming in until it becomes active. (At present the tool is activated at scales larger than 1:50,000).

A timeline will appear showing years in which historic imagery is available for your current map extent.

The numbers shown below the timeline represent how many images were captured during that year. Click a node to filter down to the month view.


Selecting a month will return the first image captured, and allow you to scroll through the Images and Projects using the Previous/Next options down along the bottom right.


While in this view you can find the latest image date. Click on the eye icon to preview the image on the map. When the image in the preview matches the imagery within the basemap layer you have found the date the image was captured.

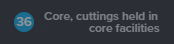
Viewing stock at core facilities
How to view core held in stock at EDC and Mount Isa Drill Core Facilities.
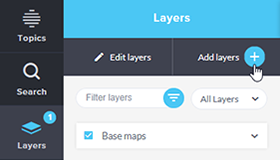
Click Layers then select Add Layers
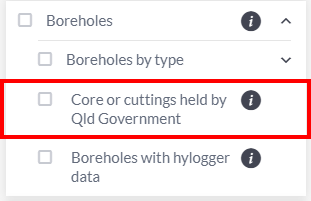
Scroll down to Boreholes and click the down chevron to expand the borehole group

Check the box next to Core/cuttings held by core facilities to display the locations for where samples held by the facilities have been taken from.
Zoom into an area of interest using the scroll button on your mouse.
Click on the spanner (top right) to open the toolbar and select the i to open the identify tools. Choose the rectangle shape.
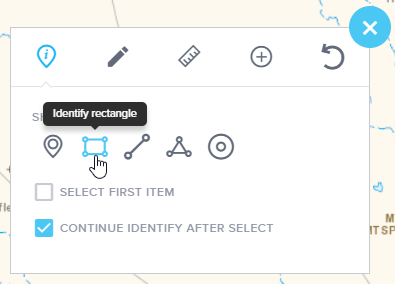
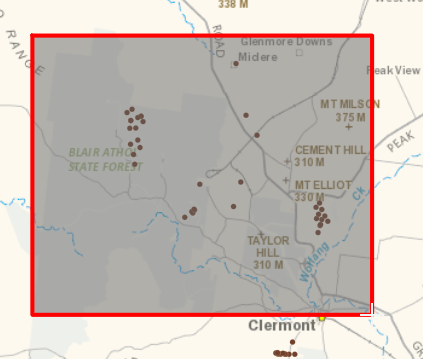
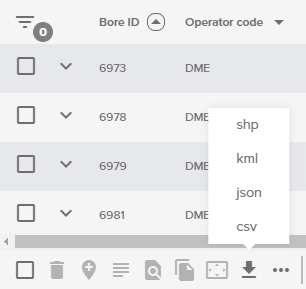
Click and drag the mouse to draw a box over an area of interest. The boreholes in this area will then be listed in the results table panel at the bottom of the screen
Click on the Core/cuttings held by core facilities tab to open the results
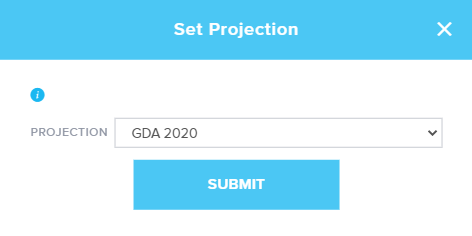
To export the data click the download button (down arrow) and select csv
Select a projection and click submit. A csv file will then download to your downloads folder.
Alert messaging
Alerts that previously appeared on the banner page are now able to be delivered within an active GeoResGlobe session, making it easier for users to stay informed.

Users can close the alert when it appears, once closed it will not re-appear in the current session unless a new message has been configured.